Does your yellow rubber duck float upright or does it (like thousands of other rubber ducks) float on its side? Here is how you can make your yellow rubber duck float upright and stop your hair from being torn out in frustration.
Material required:
The largest coin that you have. In my case, I use the 50sen coins (old version). You may need up to 5 coins for each duck.
Has this ever happened to you? Your beloved wireless karaoke microphones, your car interior handles, your favourite multi-adaptor suddenly became sticky and impossible to hold. Their rubberized coatings have turned sticky and no matter how much talcum powder you pour on them, they still remain sticky after the talcum powder wore off.
So why does rubber do this? Natural or synthetic rubber starts out as a very sticky substance. The rubber can revert back to it’s original state under certain conditions. Once that happens you’re stuck with rubber that has become sticky and tacky. (Ref: https://www.instructables.com/id/How-to-Clean-Sticky-Rubber/ )
A common method to cure this sticky rubber is to use 90% isopropyl solution. But this involves actually removing the rubber coating down to the plastic/metal base. I discovered another method that doesn’t end up removing the rubber coating but merely removes the stickiness.
It happened when my karaoke wireless microphones became impossible to hold because the rubberized handles had turned sticky. I used a handle wrap (those that we wrap around racquets to improve our grip) to wrap around the microphones’ handles and I thought nothing more about it. Until one day, as the wrap unravelled itself, I discovered that the stickiness on the microphones’ handles had gone!
You can thank me if you find that it also works for you.
I believe I have a (nearly) complete Home Entertainment setup. Here’s why I say so:
An “active” system comprising an AV Receiver with large screen HD TV, satellite receiver, digital transmission receiver, BlueRay-DVD player, media player, Chromecast, Raku Stick and a projector with a 110″ screen. And of course 6 speakers. When you watch movies and concerts, your mind has to be “active”.
A “passive” system comprising a HiFi Integrated Amp, a CD player, a sub-woofer, and HiFi speakers. Your mind is “passive” listening to beautiful music.
An “interactive” system, consisting of a PlayStation and…. the Karaoke system described below.
aTube Catcher – Video Downloader and Screen Recorder
Building the karaoke songs library
Search for the karaoke song on YouTube. If there are multiple versions, choose the one with the most views.
In aTube Catcher, select Video Downloader. Use the settings to choose the location for your downloaded files. Set the Output Profile to MP4 Video 1200kbps.
Paste the YouTube URL in the video downloader and click download.
Open the Kanto Player application and select the karaoke song that you have downloaded and enjoy!
Who has not suffered an inconvenient, irritating, embarrassing hiccup which often is untimely? Yes, everyone has had to endure it at one time or another.
What causes this annoyance?
Apparently, there are various reasons but probably the most common one is when we eat too quickly and especially when we are nervous or excited. But who cares what causes it? You are here now because you are intrigued by the title and just want to know how to stop the *&$# hiccups.
Here’s how to stop the hiccups
Disclaimer: This is something that I accidentally discovered which works wonder for me. I have not seen this method described anywhere else. It may not work for you, but why not give it a try? You have nothing to lose and I hope you will feedback to us if it does work for you.,
When the annoying hiccups start, just pinch your left thumb at the joint with your right thumb and forefinger, then apply pressure and rub /twist at the joint working down to the neck of the left thumb. Do that for a minute or so, then change to the right thumb, rubbing and twisting with your left thumb and forefinger. Do that for a minute or so. Have the hiccups gone away? If not repeat until they disappear. It shouldn’t take you more than 5 minutes.
This is all true; the events did happen and the life story is still being played out.
Sylvia, that’s the name we gave her, gave birth to five adorable kittens on 9-Feb-2020. She wandered into our home and into our lives, some two months earlier. We could tell she was pregnant and was looking for a nest to deliver her kittens. She had a collar so we tried our best to locate her owner. We asked in a few of our neighbourhood Whatsapp groups but no-one claimed her. My son remarked that she looked like Sylvester the cartoon cat, so we called her Sylvia.
And on an early afternoon of 9-Feb-2020, Sylvia, the young first-time mother, clumsily gave birth to her five kittens in the litter box. She couldn’t bite and eat the placenta which was covered with the litter material so the kittens were all stuck together still joined to the placenta. We had to rush them to the vet to separate them. The vet offered to help find adopters when the kittens are bigger. And so the five kittens stayed with Sylvia in our home; a pure white, a chocolate-coloured , a tortoiseshell, a grey-and-white and a calico. We didn’t give them names as we did not want to get too attached to them knowing that they will be given up for adoption.
On 16-Mar, I took the Pure White for an adopter. The next day, the mum Sylvia, became very distressed when she realised the kitten was missing. So late at night, she relocated the whole litter elsewhere . It was so sad. All the kittens were relocated and I couldn’t find them. Sylvia still came to see me for her own meals; breakfast, lunch and dinner…alone.
Over the next few days, Sylvia may have realised her mistake and looked so forlorn that I had to console her. A neighbour, Dr Chan Kah Yein, told me that cats are telepathic and can understand what we are saying. So I ended up talking routinely to Sylvia and urged her to bring back the kittens. She looked so sad and so was I. Perhaps, for some reason, Sylvia could not retrieve the kittens.
Then on 23-Mar-2020, a big burly ginger-coloured Tom Cat came to the house and seeing that Sylvia was cosy with him, I guess he must be her mate. I fed him as well and urged him to help Sylvia to find the kittens.
Then on the blessed morning of 24-Mar-2020, I saw the whole family back in my house with the adorable kittens all looking so happy to be back. But there is a twist to this fairy tale.
My neighbour told me that her son saw the Tom cat leading the four kittens along the road back to the house late at night. The Tom cat led the way and the four kittens followed him back. What a sight that must have been! What a pity that I didn’t get to see it.
The four kittens stayed with Sylvia contentedly until in early April, the vet called to remind me that the adopters were waiting for the kittens. She planned to come to my house to pick up Sylvia (to be spayed) and the four kittens on 15-April-2020. On the night of 14-April-2020, I was talking to my neighbour and told her that the vet was coming in the morning to take Sylvia and the kittens. Sylvia must have overheard the conversation, because the next morning the Grey-and-White and Calico were missing and I couldn’t find them anywhere. I guess Sylvia must have relocated them and couldn’t move the other two in time, as they were now bigger. By the time I caged Sylvia and the Tortoiseshell, the Chocolate one fled and I couldn’t find it even with my neighbour’s help. The vet came and took Sylvia and Tortoiseshell away at about 11.00am. But in the evening, the Chocolate one came back for food and I managed to cage it as well. The vet picked it up later that evening.
The two other kittens remained missing since the night of 14-April-2020. I brought Sylvia home after her surgery on the 17-April-2020. She looked very sad and I asked her to go and find the kittens. The Tom cat came and I coaxed them both to go and bring back the kittens. Early next morning, I was awakened by Sylvia’s loud meowing and when I went out to check, I saw that Sylvia had brought back the two kittens. Amazing! And even though Sylvia just had a surgery to spay her, she still breastfed the two kittens lovingly.
My wife and I took that as an omen and we decided to keep the two kittens. I suggested Whisky for the male Grey-and White and my wife named the female Calico as Brandy. I decided to call the big burly Tom cat, Vodka. So now we have Sylvia, the bartender, with Vodka, Whisky and Brandy.
Brandy
Whisky
Vodka
Sylvia
Update: 20-Dec-2020
Whisky and Brandy are now more than 10 months old and they are even bigger than their mother, Sylvia. But inexplicably, Sylvia left home about 4 months ago. Why? Perhaps it got too painful when the kittens still want to suckle. Or is it a territorial thing…..where the mother gives way to her grown-up kittens? In any case, after she was away for about 2 months, Sylvia suddenly turned up one day at mealtime. But she had a different demeanour and hissed and scratched at Whisky and Brandy when they tried to cuddle up to her. Vodka too suffered her mean demeanour. I fed her and as soon as she finished eating, she slinked away. And this has become her strange behaviour. She will turn up at mealtimes now and then, and each time she will disappear after eating. And she remained mean to Whisky, Brandy and Vodka. So strange, so sad. But she looked well fed and healthy, and still wore her pink collar. So some kind soul must be taking care of her…thank you, whoever you are.
To be continued…. The return of Sylvia
27-Nov-2022
On 1-Jan-2021, Sylvia suddenly returned and kept quietly by herself at the patio next to the fish pond. She abandoned her kittens for almost a year and now they do not welcome her.
But today, 27-Nov-2022, two years on, Sylvia has reconciled with Brandy not completely with Whisky. Sylvia and Brandy will groom each other but Sylvia will smack Whisky he gets too close to her. Initially Whisky will just let Sylvia hiss, smack and scratch him but lately he has begun to retaliate.
Both Sylvia and Brandy are spayed but not Whisky. Maybe that’s why Whisky is a roamer and gets into fights, as the neighbourhood Romeo. I am considering getting him neutered. But he has not returned home for the last 4 days.
Hello…Happy New Year 2017! Thank you for visiting.
Here’s my own technique for making yummy, healthy pomegranate juice AND tea, without any wastage.
1. First off, you need the pomegranate seeds, or more correctly called “arils”, and there are various techniques taught on the Internet. I opted for the following method.
1a. Slice a bit off the top and bottom.
1b. Next, look for the ridges and make shallow cuts all along the ridges where the fruit will break open.
1c. Gently pry apart the fruit, which should open along the cuts made earlier.
1d. Now gently pry the arils off the peels in a bowl of water. The water helps prevent the arils from bouncing off everywhere. I find this most helpful. The white pith will float in the water for easy removal too.
2. Use a large strainer to catch the arils and pour into a container. Now you can store these in the fridge for a fairly long period (I don’t really know how long they will keep) until you are ready to consume them. You can scoop with a spoon and eat straight off as a morning before-breakfast snack, or use for juicing as what we are discussing now.
3. For juicing, I use a simple “Shake n Take” blender. Whichever blender you use, I suggest that you use the pulse mode to gently extract the juice from the arils without breaking their inner seeds. I imagine the inner seeds, if crushed, may affect the taste of the juice. But then some say that adds more healthy stuff to the juice. It’s your choice.
4. I pour the pure pulpy mixture into the centre strainer of my tea pot and use a pestle to gently coax more juice out of the pulp. The strained juice is then poured out from the teapot into a container to chill for a refreshing healthy drink later.
5. I then add about 3/4 pot of hot boiling water to my teapot and then immerse the strainer (which contains the pulp). I pour the remaining hot water through the top of the pot/strainer. Don’t try to pour a whole pot of hot water through the strainer. The strainer is choked full of the pulp and will surely test your patience if you try that!
6. There you have it! The combined large and medium sized fruits give about 500ml of pure juice. The pulp makes one teapot of pomegranate tea. It may be a rather weak tea to some, but hey, no waste!
Bonus tip:
I was wondering whether to use the peels for my vermicasting or as garden mulch. But I discovered that the peels have many healthy uses. See the links below.
If you do try any of the health tip below and find it works for you, please share for the benefit of others at my other website, Free2Cure ( www.free2cure.com ), which publishes first-person testimonials on natural remedies to eliminate doubt and hear-say.
Yesterday I had guests over for dinner. In preparation for the drinks, I checked out my wine collection and I happened to have Merlot, Bordeaux and Cabernet Sauvignon. I decided to conduct a research about them to make for a light drinkers’ conversation piece – a talking point. I discovered these three wines originated from the Bordeaux Region with a fascinating history about them. The Cabernet Sauvignon is actually a cross between two grape varieties found in Bordeaux, the Cabernet franc and Sauvignon blanc, giving rise to the famous Cabernet Sauvignon while the Merlot is supposedly the most widely grown grape in Bordeaux. To my surprise, a Bordeaux red wine is actually a blend of Merlot and Cabernet Sauvignon. And when you order a Bordeaux red wine, the taste depends on whether the winery is on the Left Bank or the Right Bank of the Gironde estuary which cuts through the center of the Bordeaux region.
If the winery is located on the Left Bank, the blend created will have more Cabernet Sauvignon than Merlot. If the winery is instead located on the Right Bank of the river, the wine will have more Merlot in the blend than Cabernet Sauvignon. (ref: http://vinepair.com/wine-101/bordeaux-what-is-bordeaux-wine/ )
Now, a disclaimer. Not all my three wines are from Bordeaux, France. My Merlot is a Taylors’ 2007 from Clare Valley, Australia while my Cabernet Sauvignon 2014 is from the Santa Rita winery in Chile. Only my Bordeaux 2008 is from Bordeaux, France; hailing from the Chateau De Potiron with an appropriate appellation from Bordeaux.
And the verdict?
All my guests and I thought the Cabernet Sauvignon was the best.
I have not developed my taste buds and palate to be able to describe the wines beyond the simplistic sweet/dry/tannin/smooth language. So here goes:
In terms of sweetness/dryness, the wines are ranked in the order Merlot, Bordeaux and Cabernet Sauvignon, with the Cabernet Sauvignon the driest. The Australian Merlot was a pleasant medium sweet/medium dry wine and the French Bordeaux had a slight tannin taste. But the Chilean Cabernet Sauvignon was really smooth and delightfully dry.
That made me curious about the Santa Rita winery and why do they label their wine “120: Honouring 120 Heroes”. The story I uncovered follows:
Santa Rita’s internationally popular, best-selling “120” Series of varietal wines recalls the heroes of a pivotal event in Chile’s successful 19th century struggle to overthrow Spanish rule. History relates that in the early 1800s Doña Paula Jaraquemada, then proprietor of the Santa Rita manor house and estate near the Chilean capital of Santiago, famously gave refuge in the cellars of her property to 120 Chilean patriots. When a brigade of Spanish soldiers arrived at the expansive one-story ranch house in search the band of rebels, the feisty matriarch stated she would rather see the Spanish burn the property to the ground, with her inside, then let them step foot within her family home. Thus it was that band of 120 men lived on to fight another day, and the dwelling, now site of Santa Rita’s highly acclaimed Doña Paula Restaurant, occupies a unique place in Chilean national history.
Isn’t that interesting! What was supposed to be a quiet dinner and wine among friends turned out to be a pleasant evening of discovery of some little snippets of history of the wine.
So ends my first (hopefully of many to come) wine story. Cheers!
HBO’s new TV series, “The Brink” shows why you should be very afraid; that World War III is just a sneeze away. Considering that the people who run the affairs of the world are very human after all; they are not infallible, they are not unique, they are very ordinary humans with human weaknesses that can wreck havoc with our world and our lives.
Each episode is only 30 minutes and that is enough as you really need to surface for a breath of air; any longer than that and you many be brain dead.
I was either not paying attention to the run-up advertisements or there was no fanfare, and the series just crept up on me, with the first episode on HBO on 21-June-2015. I was just surfing the Astro channels looking for something interesting to record and saw this new series with its first episode later that night. I recorded it and viewed it later and boy! I was blown away.
The series is a dark comedy featuring a geopolitical crisis somewhere in the world and how the main characters react to it or caused it. The first season will focus on Pakistan. The main characters (at least in Episode 1) are a womanising, alcoholic Secretary of State, Walter Larson (Tim Robbins), a low-level Foreign Services officer based in the US Embassy in Pakistan, Alex Talbot (Jack Black) and Navy fighter pilot Zeke Tilson (Pablo Schreiber) who pops pills. Episode 1 ended with POTUS (President of the United States) ordering a pre-emptive strike on a Pakistani nuclear site and a Navy jet streaking in to bomb the site. May God save us all!
Episode 2 has just aired. Catch the two episodes before it gets too far into the season.
I have been very keen in herbal remedies ever since 1998 when my mother-in-law was saved by a herb after doctors had given up hope on her when they deemed her renal failure was no longer treatable.
When she recovered after we put her on a course of urena lobata (“Sar Boh Chau”) herbal tea, and she went on to live a healthy life for 22 more years, I started a website, Free2Cure, to put on record her case study (https://www.free2cure.com/chronic-renal-failure/)and to solicit first-person testimonials of any other successful natural remedy to help anyone in need.
But I am also acutely aware that my brief description of the herbal tea preparation, typically the common advice of “boil 3 cups until 1 cup” is too vague and does not instill confidence for anyone who needs to understand the “how’s and why’s” of the herbal tea preparation.
As such, I scoured the Internet and researched this topic and what follows, I believe, is the definitive guide to making herbal tea. It should provide answers to the “what, when, why and how” of herbal tea preparation. If there’s any gap, error or falsehood in this guide, please post your comment here, and together we’ll continually improve and add to our collective knowledge.
First off, “herbal tea” in its common usage, is a misnomer, since “tea” is actually a beverage prepared by pouring hot or boiling water over cured leaves of the tea plant, Camellia sinensis.
“Herbal tea” (or more accurately “tisane”) as referred to and described in this article, does not involve the tea plant, Camellia sinensis, but is any beverage made from the infusion (hot tisane) or decoction (boiled tisane) of herbs, spices, or other plant material and usually does not contain caffeine. But, we will call it “Herbal Tea” here as it is commonly referred to.
A herbal tea is often consumed for its physical or medicinal effects, especially for its stimulant, relaxant or sedative properties.
Herbal teas generally have lower antioxidant values than true teas but there are exceptions (eg. Misai Kucing) with antioxidant properties comparable to black teas.
Since the liquid medium is water, herbal tea is only useful to extract water soluble active chemicals from the target herb and to release the volatile essential oils (if present).
To extract non-water-soluble active chemicals, other methods like tincture may be used.
Maceration, tincture, elixir, tonic, syrup, etc. to extract the beneficial constituents of a target herb will be discussed in a separate article. Top
Infusion
Well used 1-litre stainless steel kettle for boiling water for herbal tea
Infusion is made by bringing freshly drawn water to a light boil and then adding the hot water to the herb in an appropriate container. The container must be covered to retain the volatile essential oils, and the herb is steeped in the hot water for the desired duration.
As such, infusion is used to extract minerals, vitamins and volatile essential oils from the soft parts of the plant such as leaves or flowers (fresh or dried) or citrus peelings or fruits.
Glass teapot with strainer and cover for infusion of herbal tea
Pre-heat the pot and cup by swirling hot water and pouring off. The warmed tea pot will prevent the water from cooling too quickly so that the full flavour of the tea is not lost. Another good reason to do that is avoid cracking your glass tea pot through a sudden drastic change in temperature which may happen if you just dump the full volume of boiling hot water into the pot. After you have pre-heated the pot, add the appropriate amount of herb followed by the lightly boiled water.
My ensemble of cups, teapot, strainer to make herbal tea
Some herbalists recommend not to stir but to just let the herb(s) steep within the confines of the pot or cup. Probably, this is to prevent the loss of the volatile essential oils if you lift the cover to stir.
While tea is normally steeped for only 1-3 minutes to avoid excessive bitter tannins, herbal tea is steeped for at least 5 minutes and usually 10-20 minutes. Some herbalists recommend the use of higher dosage to make a stronger herbal tea rather then a longer steeping time. Top
Cold Infusion
1-litre glass jar for cold infusion of herbal tea
While “infusion” generally refers to “hot tea”, you could also use cold water instead of hot water especially for the more delicate herbs that may be adversely affected by heat.
Cold infusion gives a different flavour to the herbal tea as the chemical balance will be different from that imparted by hot infusion. As before, use freshly drawn water (filtered or mineral water) and add the cold water to the herb(s) in the glass/porcelain tea pot and keep covered. Allow it to steep for up to 24 hours. Dosage is similar to that for hot infusions.
But be very careful; the dried or fresh herb must be clean as there is no heat to kill any bacteria that may be present in the herb. In case of doubt about its cleanliness, do a quick rinse of the herb with boiling water, before using for the cold infusion.
Use a pestle and mortar to crush whole herbs to “open” them up before the cold infusion.
Drink the finished tea as is or chilled or sweetened; whatever your taste. Some may prefer to gently warm up the tea to drinking temperature.
Use a bottle or jar instead of a tea pot to make larger quantities. Top
Tapping the Sun’s energy for a herbal infusion
Sun Infusion (Yang)
Sun infusion supposedly harnesses the sun’s masculine yang energy to stimulate the water and herb(s). Use a big jar and fill it with clean freshly drawn water to keep the herb(s) submerged. Keep the jar open or cover with some fabric like muslin cloth to keep dirt out. Put the jar in a sunny spot to infuse for at least 4 hours. The tea is ready when it is fragrant and the liquid is full of color. Strain and drink throughout the day. Top
Moon Infusion (Yin)
Moon infusion supposedly harnesses the moon’s feminine yin energy which is more subtle, cool and passive than the sun’s energy.
Apparently, moon infusions under the different phases of the moon will impart different effect on the infused herbal tea although generally it seems like a good idea to do it under a full moon.
Again, keep the jar open or covered with a fabric like muslin cloth to keep dirt out. Moon infusions are generally kept overnight in the moonlight.
The beauty of making lunar infusions is the ability of these to capture the energy of the moon phases and their relative teachings into the tea. A full moon tea will bring more bright, illuminating, and culminating energy to a blend, while a waning moon infusion will invoke a remembrance of rest, calm, and letting go. Herbalists pay close attention to the moon and we use the moon for harvesting. We harvest some flowers and plant tops under the light of the full moon, when the energy of the plant is lifted like the tides into the highest part of the plant. And we harvest roots and tubers under the darkness of the new moon when the energy is calm, the tides are low, and the plants have their intelligent life-force nestled deep into the earth below.
The guiding principle is that herbal tea is meant for its therapeutic value rather than its flavour, unlike the case of drinking tea.
Therefore, the material of the container must not contaminate the herbs. As such inert material is preferred over clay or cast iron, two of the popular types of tea pots for making tea (not herbal tisane).
The recommended material for the pot for herbal tisane is glass or porcelain. Metallic containers like aluminium and copper may react adversely with some herbs. If you have to use metallic pots, I believe stainless steel is inert and will not react with the herb. Other sources recommend enamel pots but I would not use use them as the enamel can chip off and expose the metal (cast iron or mild steel) which can rust. Traditional Chinese tea is usually infused in clay or ceramic pots. For our herbal tea, stick to glass, porcelain or stainless steel. Glass has the added bonus of a delightful visual sense to add to the enjoyment of the herbal tea. The downside of glass is that glass is a poor heat insulator and tends to cool down quite fast compared to clay (or porcelain).
The longer you infuse the herbs, the stronger and more effective the active constituents will be. But the flavour may alter with different steeping times, so experiment to suit your taste with a minimum steeping time of 10 minutes.
And remember, the pot must have a cover or lid.
Choose the size of the container appropriate for the quantity of herbal tea. Do not use a large pot for a small quantity of herbal tea. Top
What is the recommended dosage?
Generally, the recommended dosage is about 1 teaspoon to 1 tablespoon of dried herb or 2 tablespoons of fresh herb per 8 oz (240 ml) of water (1 cup). But this is only a guideline as different herbs have different potency.
Add 2 tablespoons of fresh, or 1 tablespoon of dried herb (or crushed seed) to the pot for each cup of water, plus an extra 2 tablespoons of fresh or 1 tablespoon of dried “for the pot.” (For iced tea, increase to 3 tablespoons of fresh and 2 tablespoons of dried herb to allow for watering down by melting ice).
Therefore, if making 2 cups of hot tea, you would use 6 tablespoons of fresh herb or 3 tablespoons of dried herb in a pot.
Alternatively, a very general guideline is to take a cupped handful of fresh herb for a quart (0.88 litre) of water.
From the foregoing, you will notice that if you are using fresh herbs for your tisane, use twice the amount you would use if the herb were dry. This is because the water content in fresh herbs dilutes their flavor. As one herbalist wrote, “Let your hands, eyes, nose and heart guide you”.
Note: 1 g dried herb approx = 1.5 tsp dried herb
The average dosage is usually 3 to 4 cups in a day. Top
Decoction
Stainless steel pot with glass cover for decoction of herbal tea
A decoction is used to extract primarily the mineral salts and bitter principles of plants from hard materials such as roots, bark, seeds and wood. These hard materials generally require boiling for at least 10 minutes and then are allowed to steep longer, sometimes for a number of hours. The word “decoct” means to extract the essence from (something) by heating or boiling it. The tea is boiled down and concentrated so that water may need to be added before drinking, in some cases. But a general guideline is to use 3 bowls of water and boiled/simmered until 1 bowl.
Put 1-3 tablespoons of cut herb, seed, root, bark, etc into a pot of 16-32 oz of water and allow to sit in non-boiled water for at least 5-10 minutes. Set on stove and bring to a slow boil then turn down to a simmer for 10-30 minutes. Strain and drink. Will keep about 72 hours if kept refrigerated. Most decoctions can also be brewed via single cup through a regular infusion process as noted above but without the strength.
The decoction method is used for hard, woody substances (such as roots, bark, and stems) that have constituents that are water-soluble and non-volatile. (Red clover is an exception, because red clover flower decoction will extract more minerals that the infusion.)
Decoctions extract mainly mineral salts and bitter principles. Decoctions are intended for immediate use.
Store for a maximum of 72 hours in the refrigerator.
Amounts can vary, depending upon your taste and the potency of the herbs, however 1 to 2 teaspoons of herb mixture to each cup of water is a good starting point. Roots and barks are more concentrated than the lighter leaves and flowers used in infusions, so less is needed. Top
Heating method for the decoction
There seems to be conflicting views as to how to boil the herb(s). The following methods are extracted from different sources.
Method 1:
Start with cold water over a low heat and slowly bring herb mixture to a simmering boil. Keep the pot covered and simmer for ten to 20 minutes. Take off heat and leave covered while your decoction cools to drinking temperature.
Method 2:
Use this method when the material you want to extract is a bitter, or mineral salt. The whole herb, roots or seeds, or the bark of a woody plant are soaked in cold water for several hours, then brought to a boil and simmered for 30 minutes.
Method 3:
Add 3 cups of water to the herbs and bring the mixture to a boil using relatively high heat. Reduce to medium heat and continue to boil (for approximately 20 minutes) until 1 cup of strong, dark liquid remains.
Strain the liquid into a large glass or ceramic container. This is the first dose (the strongest) of your herbal medicine.
Add 2 cups of water to the previously cooked herbs. Continue to simmer under medium to low heat for approximately 20 minutes, until 1 cup of liquid remains.
Strain the liquid and pour it into the same container holding the previous dose.
Repeat the last two steps one more time to make a third dose of medicine, which you again combine with the previous two doses.
When finished you should have approximately 3 cups of herbal medicine, and can now discard the cooked herbs. You will generally take 1 cup of your decoction three times a day, but this depends on your individual condition. Decoctions should be drunk slightly warm (like tea). Some herbs may taste a bit bitter, and if so you can usually sweeten them with a small amount of honey. Your decoction should keep for about 2-3 days if sealed and refrigerated.
I personally adopt Method 3 most of the time.
Why you boil a decoction three times
It is important to boil the herbs three times for 20-minutes each time, rather than all at once for one hour. Many of the herbs in your formula will contain some volatile aromatic oils as active ingredients. These oils will be retained in a short 20-minute boiling, but will probably evaporate after an hour at high temperature. Other components of your herbal formula (such as the active ingredients in hard roots or nuts) might take an hour to be fully extracted, however.
Thus the best method of preparing the decoction is to boil the herbs for 20 minutes three times in a row, combining and mixing all three doses. This ensures that all the various active herbal ingredients are present in the final medicine. Top
Mortar and pestle to crush herbs to aid making herbal tea
&bnsp;
Mortar and pestle
A mortar and pestle can be used to crush the herb(s) to aid in the infusion or decoction of the herbal tea, especially anything tough or hard, like nuts or barks.
For the freshest tasting cup of tea, you should always use mineral water or freshly drawn water direct from the tap that has been running for a while. Standing water loses oxygen, and the resulting tea tastes flat. If your tap water is chlorinated, a compromise can be reached by drawing fresh water and letting it stand uncovered for a couple of hours to allow the chlorine taste to leave the water; although, using mineral water is a quick and easy solution. Boiling the water for long periods also removes oxygen from the water, so always use fresh water (do not re-boil it), and use the water quickly after it comes to a boil.
http://en.wikibooks.org/wiki/Cookbook:A_Nice_Cup_of_Tea
Traditionally, in Asia, water is always brought to gentle boil before one prepares tea. Boiling water eliminates many harmful germs and bacteria. Though water quality has improved vastly, boiling in the water in this fashion can help to bring out tea’s flavor. The water should be heated until a steady stream of air bubbles gently rise to the surface. At this point, the water is sufficiently heated and also has a preferable oxygen content. In contrast, using water that has been held at a fierce, rolling boil can leave tea tasting dull and flat.
Try this the next time you use your juicer to make fruit juice. Make sure the container for the pulp is clean before you start juicing. After juicing, the collected pulp can be put into a tea bag/filter and used for fruit tisane infusion. Now you can have your juice and fruit tea, no waste!
Fruit pulp can be transferred to the strainer of teapot to make fruit tea
Case Study
I used my juicer to make some fruit juice as usual, but this time instead of throwing away the pulp, I used the pulp to make a fruit tea (infusion).
Ingredients :
2 beetroot
3 large green apples
2 organges
3 promegranate
L – 1-litre glass teapot fruit tea, R – 1-litre glass jar fruit juice
Output:
1-litre fruit juice, and pulp sufficient for 3-litres of fruit tea.
The above ingredients produced almost a litre of fruit juice while the pulp was sufficient for 3 litres of fruit tea. I packed my teapot’s strainer full of pulp to make a fresh infusion of fruit tea. The balance of the pulp was kept in the fridge and used over two days to make two more pots of fruit tea.
Final note:
When you are making your herbal tea, you need a cat curled up at your feet to make it truly magical. Just kidding! (…. but it can’t hurt to try).
Tickle my tummy and I’ll transform your herbal tea
My brother recently asked me…is a Zebra white with black stripes or black with white stripes? Here is my reply: There are two types of Zebras. A white one has black stripes and a black one has white stripes. As with most things in this world. …. Lau Kean Lee, 29-March-2014
This photo is licensed under the Creative Commons Attribution-Share Alike 2.0 Generic license, by Daniel Stockman.
Have you at some point in your life waxed lyrical over a seemingly profound statement or article? And did that P word, “Philosophy”, come to mind? In my case, my first brush with a profound idea must have been the time (when I was 12 or 13 years old) I saw a picture of a “thinking man”; a bronze sculpture by Auguste Rodin of a naked man sitting on a rock with his chin resting on a hand, deep in thought. The caption on that photo read, “I think therefore I am”, by René Descartes. “Wow, that sounds pretty deep, but what did it really mean?”
“I think therefore I am” – René Descartes
I thought to myself. And that started a life-long journey to understand and make sense of this thing called Philosophy.
Most people, and I am one of those, would just go through life without really digging deeper into Philosophy and just take whatever small doses that may come along in our day-to-day living. Sometimes it comes in the guise of comedy, as when Charles M. Schulz made his Linus character in Peanuts say, “I love Mankind; it’s people I can’t stand!”. Or sometimes it gets splashed in my face as when watching my favourite SciFi, Star Trek and Spock spoke the memorable line, “The needs of the many outweigh the needs of the few”. And in later life, one finds that spirituality is steeped in profound ideas, as this website’s by-line ascribed to the Buddha, “Thousands of candles can be lit from a single candle, and the life of the candle will not be shortened. Happiness never decreases by being shared.”
I am now making an effort to actually understand what exactly is Philosophy. In my library, I found three books to educate myself on this nebulous subject.
1. The Story Of Philosophy – Bryan Magee
The Story of Philosophy by Bryan Magee
Prof Bryan Magee from the Oxford University was also a Fellow of the Yale University. He wrote this surprisingly readable book on a difficult subject.
In just four pages, the prelude “An Introduction To Philosophy” pages 6-9, the meaning of Philosophy shone with clarity. In any field of human activity, we can question the fundamentals normally taken for granted. Prof Magee introduced the concept gently by giving simple examples in diversed subjects or disciplines, like when one asks what is Freedom and what is Equality and are they in conflict, as in politics (Political Philosophy); or when one asks what is Justice in law and is that the same as social justice (Philosophy of Law); or when one asks is there perfect health, and if not what is the meaning of cure (Philosophy of Medicine).
“What is the nature of whatever it is that exists?” “How, if at all, can we know?”
While this demonstrates that there can be a philosophical discourse in any subject, the greatest philosophers go deeper than that and questioned the most fundamental aspects of our existence and our experience. The two fundamental questions at the heart of Philosophy are: “What is the nature of whatever it is that exists?” (ontology) and “How, if at all, can we know?” (epistemology). Prof Magee then rounds off his introduction to philosophy by stressing that Philosophy, Science and Art are not at odds with one another. All three confront the mystery posed by the two fundamental questions to try to achieve a deeper understanding. All three rely on inspiration and criticism and make their findings public to be shared. And yet because they follow different methods and different paths, they appeal to different temperaments. (Note: this last word, “temperament” makes for interesting reading by itself… ref: http://en.wikipedia.org/wiki/Four_temperaments). The rest of the book then delves into the different great philosophers and their respective era.
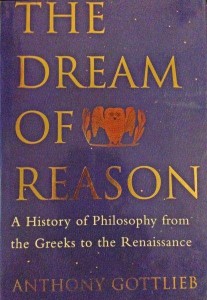
2. The Dream of Reason – Anthony Gottlieb
The Dream of Reason by Anthony Gottlieb
Anthony Gottlieb was from Cambridge University but he was a professional journalist having served as Science Editor and Executive Editor of The Economist even though he was also a Visiting Fellow at Harvard University. So it is interesting to read Anthony’s take on Philosophy from a journalist’s approach, viz. “…to rely only on primary sources, whenever they still exist, to question conventional wisdom, and … to explain it as clearly as possible.”
And so you find in “The Dream of Reason” (A History of Philosophy from the Greeks to the Renaissance), a readable journalistic account of philosophers’ stubborn or obstinate effort to think clearly.
I found his Part 3, Chapter 13, “Three Roads to Tranquillity: Epicureans, Stoics and Sceptics” particularly interesting. Alexander the Great’s death in 323 BC marks the start of a new era, the “Hellenistic age”. It means that Alexander’s former domain became Greek-ish rather than purely Greek. It brought a new era in philosophy as well, with three main schools of thought; the Epicureans, the Stoics and the Sceptics. If an Epicurean said one thing, a Stoic would say the opposite and a Sceptic would refuse to commit either way. How interesting!
In the final Chapter 14, we learn that in AD 529, a Christian emperor, Justinian, put an end to the philosophical squabbles by closing down the philosophical schools in Athens in favour of his own imperial university in Constantinople and wanted to ban non-Christian philosophy throughout the Roman Empire. And so philosophy languished in the “haven of piety” for the next thousand years.
“I was struck by the large number of falsehoods I had accepted as true in my childhood.” – René Descartes
Enter the French philosopher and mathematician, René Descartes (1596-1650), who developed the rigorous mechanistic model where he “consider(s) false any belief that falls prey to even the slightest doubt”. This is considered “Rationalism” and Descartes earned the title, “Father of Modern Philosophy”.
Gottlieb intended to write a second volume to continue the tale from Descartes to the present day, but as far as I know, it has not been published until today. Hopefully, it will be witten and published in due course.
3. Sophie’s World – Jostein Gaarder
Sophie’s World by Jostein Gaarder
Jostein Gaarder was a Norwegian high-school teacher of Philosophy. He used his teaching capability to write a popular novel which effectively covers the 3,000 years history of philosophy from Socrates to Sartre. Very much like how modern-day management books are written as business fables, Gaarder first published his novel in his native Norwegian in 1991, revolving around a 14-year old girl, Sophie, who progressively learnt Philosophy through a prolonged correspondence with a fifty-year-old philosopher, Alberto Knox. The novel begins with Sophie receiving a mysterious letter with a question, “Who are you?” and then a second letter with an equally intriguing question, “Where does the world come from?” The third mail came in the form of a postcard addressed to another girl, Hilde, c/o Sophie.
“If a man will begin with certainties, he shall end in doubts; but if he will be content to begin with doubts, he shall end in certainties.” – Francis Bacon
What followed were a series of philosophical lessons taught to Sophie by Alberto. How Hilde fit into this story, if told here, would be a spoiler. Suffice to say that in the course of the novel, Sophie and Hilde (and thus we the readers) are taken on a grand tour of the history of Western Philosophy.
Where Gottlieb left off, Gaarder continued from Descartes, Spinoza, Locke and others to The Enlightenment (the Renaissance) and Romanticism until the Present.
The novel is reputed to have been translated into fifty-three languages, with over thirty million copies in print. In 1997, Jostein Gaarder and his wife, Siri Dannevig, established the Sophie Prize (named after the book), a USD100,000 annual international award for environment and development. Unfortunately, Gaarder found himself embroiled in allegations of anti-Semitism after he wrote an article in 2006 criticising and condemning certain aspects of Israeli politics and Judaism.
(ref: http://en.wikipedia.org/wiki/Jostein_Gaarder)
Footnote:
I was intrigued by Francis Bacon (1561-1626), and read up on him on Wikipedia.
“Bacon has been called the creator of empiricism. His works established and popularised inductive methodologies for scientific inquiry, often called the Baconian method, or simply the scientific method. His demand for a planned procedure of investigating all things natural marked a new turn in the rhetorical and theoretical framework for science, much of which still surrounds conceptions of proper methodology today.”
As it turns out, while Descartes and Rationalism were widely populart in Europe, Francis Bacon’s Empiricism in England can be seen as a counter-point to Rationalism.
Leibniz, a rationalist, said “There are two kinds of truths: truths of reasoning and truths of fact.” While John Locke, an empiricist, said “No man’s knowledge here can go beyond his experience”. It must be noted that Prof Magee wrote that Locke is considered the chief founding father of empiricism.
Thousands of candles can be lit from a single candle, and the life of the candle will not be shortened. Happiness never decreases by being shared. – The Buddha


 Glue one coin at a time
 It took 5 coins to keep it upright
 The duck is floating upright